
GWBplugin – Getting started with C++
The GWB plug-in feature is implemented as a Dynamic-Link Library (DLL). For C++ we provide a GWBplugin wrapper class contained in the header file GWBplugin.h and the GWBplugin.dll export library GWBplugin.lib to link against. This page answers common queries about how to use the C++ version of the plug-in feature.
Using the plug-in
Using the GWB plug-in feature:
- Compiling your program and linking to the GWB plug-in library.
- GWBplugin C++ wrapper class overview.
- Initializing the GWB application you wish to use.
- Configure and execute your calculations.
- Retrieving the results.
Compiling your program and linking to the GWB plug-in library.
The GWB plug-in has been tested on C++ compilers from Microsoft, Intel, and GCC. The header file GWBplugin.h you need is installed to your computer in the "src" directory of the GWB directory. The library you need to link to GWBplugin.lib is installed in the GWB directory (in earlier versions of GWB the library file was also in the "src" directory). For step-by-step instructions on setting up your build environment and examples using the Visual Studio command line, Visual Studio, and MinGW/MSYS/g++ please see the Quickstart tutorials and examples.
GWBplugin C++ wrapper class overview.
This is a synopsis of the C++ wrapper class provided in GWBplugin.h in the "src" directory of the GWB installation folder.
// GWBplugin.h

#define ANULL  -999999.0       // marker for an undefined value

class GWBplugin {
public:
GWBplugin();
~GWBplugin();
int initialize(const char* app_name, const char* file_name = NULL, const char* cmds = NULL);
int exec_cmd(char* uline);
int results(void* data, const char* value, const char* units  = NULL , int ix  = 0 , int jy  = 0);
};
Initializing the GWB application you wish to use.
Within your code you must first create a "GWBplugin" object. Next, use the "initialize" function to start the GWB application of interest by passing the application name, a optional file name for the GWB application to write output to, and any command-line type arguments.
Configure and execute your calculations.
The "exec_cmd" function can be used to transmit commands to the plug-in. Each application has a chapter in the reference manual of the documentation on what commands are available. You use these commands to configure the application and then send a "go" command to trigger the calculations.
Retrieving the results.
Retrieving the results using the GWB plug-in feature can be accomplished using the "results" function. The keywords, default units, and return types are the same as those listed in the Report Command chapter of the reference manual in the documentation. To use the "results" function you provide the address of a data block to fill, along with the desired report command and keywords, optional desired units, and the node location of choice (X1t and X2t only).
Quickstart tutorials and examples
Step-by-step instructions for compiling GWBplugin Example 1 on the command line with the Microsoft or Intel compiler.
For this tutorial you will need to have Microsoft's Visual Studio (or Intel's C++ compiler) installed in addition to GWB 9.0.2 (or later). If you do not already have Visual Studio you can use the free Community edition found on the Visual Studio download page.
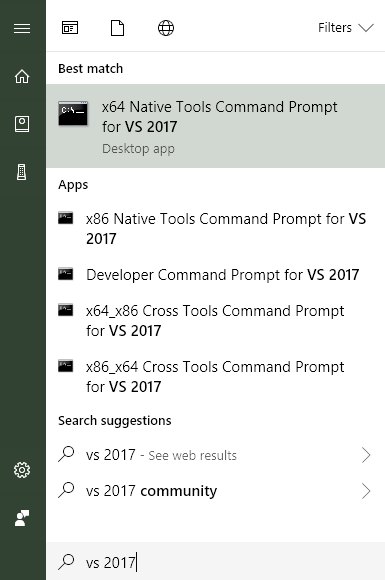
The first thing you need to do is to open the Visual Studio Command Prompt – Or Intel's ...
Then create a working folder ...
mkdir "%homepath%\GWBplugin"
Change to that folder ...
cd "%homepath%\GWBplugin"
Copy the "src" folder from GWB installation – default install path shown ...
copy /Y "C:\Program Files\GWB\src"
Copy the GWBplugin.lib file from GWB installation – default install path shown ...
copy /Y "C:\Program Files\GWB\gwbplugin.lib"
Add the GWB installation folder to your path ...
set path=C:\Program Files\GWB;%path%
Compile the example file and tell the compiler to use the GWBplugin libary – For Intel use icl instead of cl...
cl GWBplugin_Cpp_Example1.cpp gwbplugin.lib
You are now ready to run the example ...
GWBplugin_Cpp_Example1.exe
Which should produce output similar to the following ...
Beginning run.
Finished run.

concentration of Cl- in molal is       0.05
concentration of Cl- in mg/kg is       1770

There are 4 aqueous species.

Cl-  =       1770 mg/kg
H+   = 1.139e-005 mg/kg
HCl  = 1.234e-011 mg/kg
OH-  =    0.02039 mg/kg
Congratulations on plugging into the GWB!
Step-by-step instructions for compiling GWBplugin Example 1 on the command line with MinGW, MSYS, and g++.
For this tutorial you will need to have MinGW with the g++ compiler and MSYS installed in addition to GWB 9.0.2 (or later).
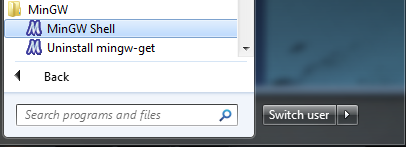
The first thing you need to do is to launch the MinGW Shell ...
Then create a working folder ...
mkdir -p ~/GWBplugin
Change to that folder ...
cd ~/GWBplugin
Copy the "src" folder from GWB installation – default install path shown ...
cp /c/program\ files/gwb/src/* .
Copy the GWBplugin.lib file from GWB installation – default install path shown ...
cp /c/program\ files/gwb/gwbplugin.lib .
Add the GWB installation folder to your path ...
PATH=/c/program\ files/gwb:$PATH
Compile the example file and tell the compiler to use the GWBplugin libary ...
g++ GWBplugin_Cpp_Example1.cpp GWBplugin.lib -o GWBplugin_Cpp_Example1.exe
You are now ready to run the example ...
./GWBplugin_Cpp_Example1.exe
Which should produce output similar to the following ...
Beginning run.
Finished run.

concentration of Cl- in molal is       0.05
concentration of Cl- in mg/kg is       1770

There are 4 aqueous species.

Cl-  =       1770 mg/kg
H+   = 1.139e-005 mg/kg
HCl  = 1.234e-011 mg/kg
OH-  =    0.02039 mg/kg
Congratulations on plugging into the GWB!
Step-by-step instructions for compiling GWBplugin Example 1 in Microsoft Visual Studio 2017.
For this tutorial you will need to have Microsoft's Visual Studio 2017 installed in addition to GWB11 (or later). If you do not already have Visual Studio you can use the free Community edition found on the Visual Studio download page.
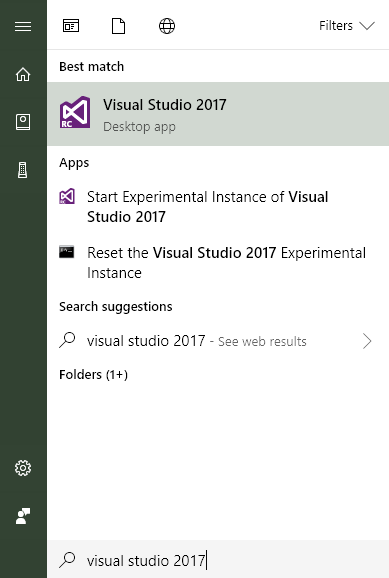
The first thing you need to do is to open Visual Studio ...
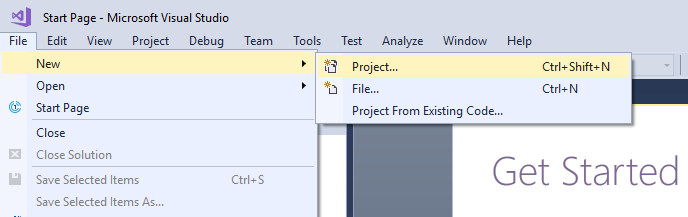
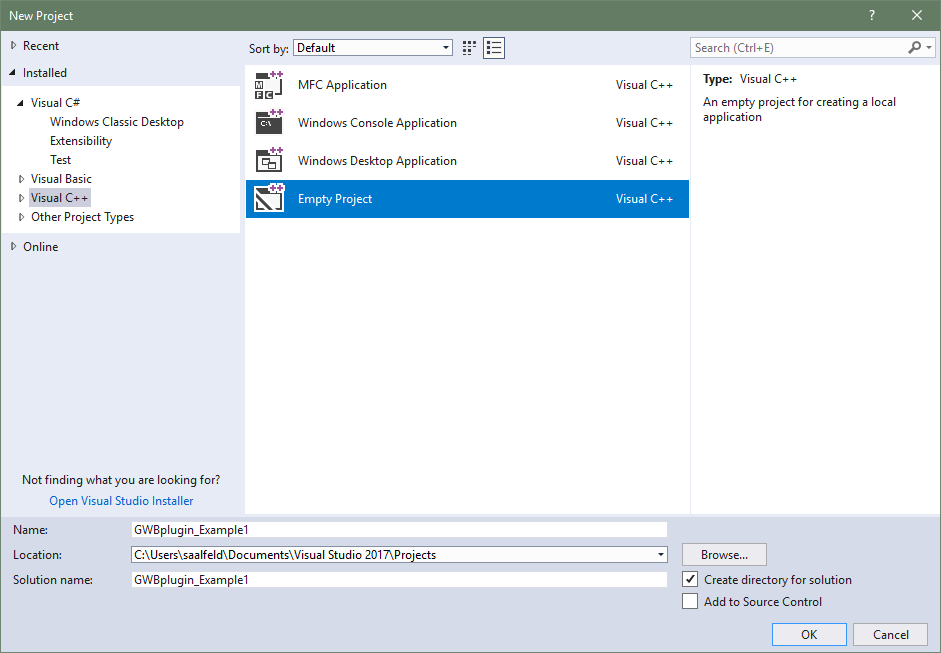
Then create a new project ... Ctrl+Shift+N
Select the 'Visual C++' project type and use the 'Empty Project' Template. Give the project a name e.g. 'GWBplugin_example1'. Click 'OK' ...
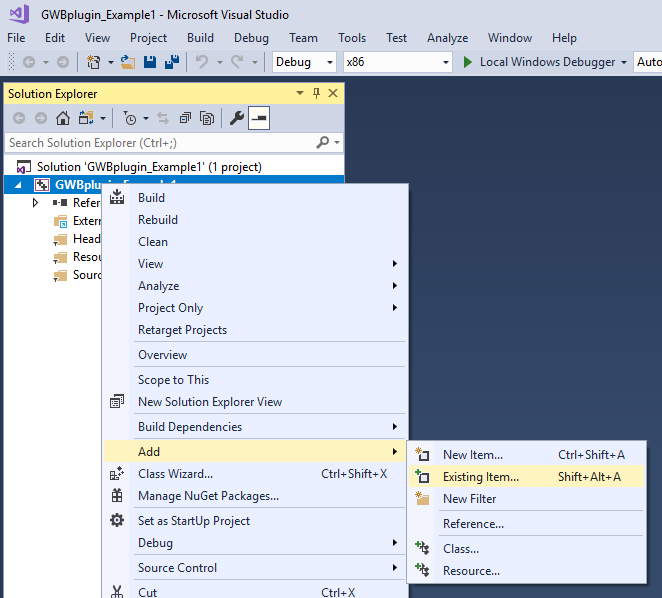
Select the project in the 'Solution Explorer' (Ctrl+Alt+L opens it if it isn't already). Right click the project and select 'Add' then 'Existing Item...' (Shift+Alt+A)
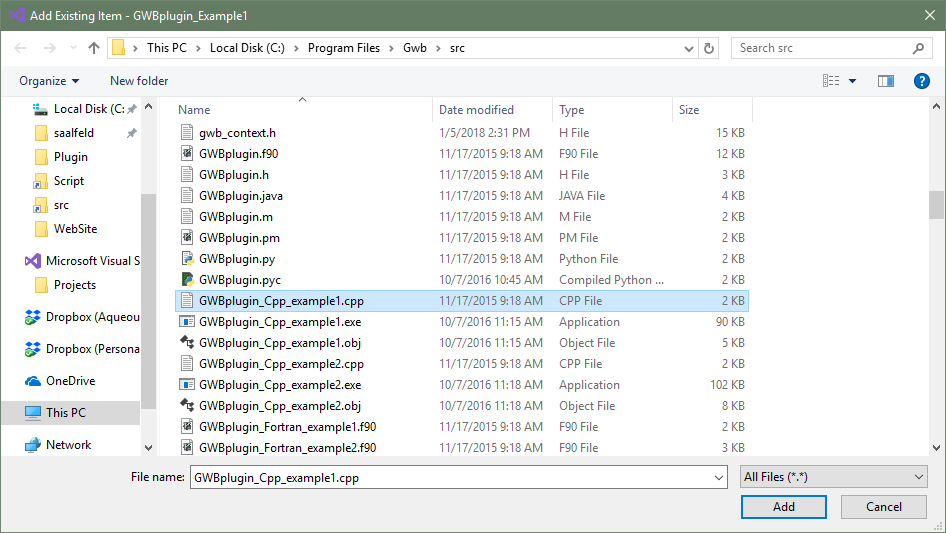
Browse to the 'src' subfolder of your GWB installation and select the 'GWBpugin_Cpp_example1.cpp' file and click 'Add'
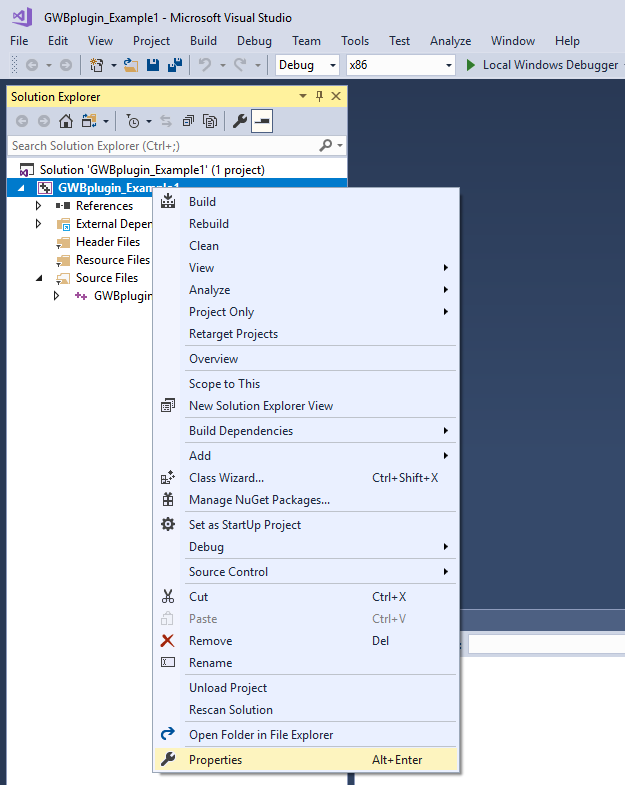
Right click the project and open its 'Properties' ... Alt+Enter
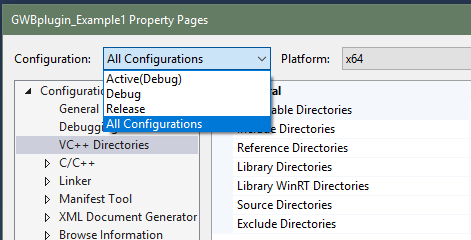
Select 'All Configurations' in the Configuration dropdown menu...
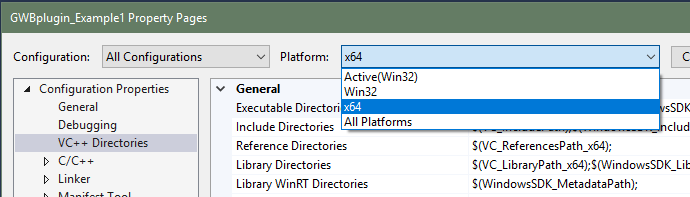
Select the platform matching the version of GWB you have installed in the Platform dropdown menu: 'x64' for 64-bit GWB or 'Win32' for 32-bit GWB
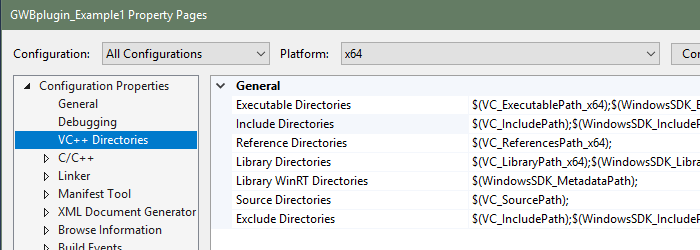
Select the 'VC++ Directories' page under the 'Configuration Properties' section
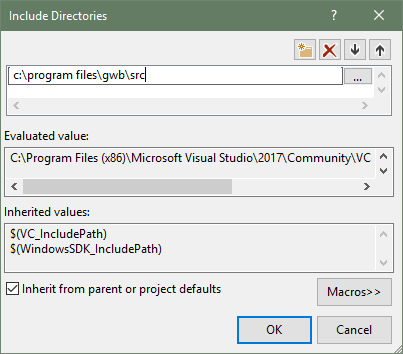
Edit the 'Include Directories' value.
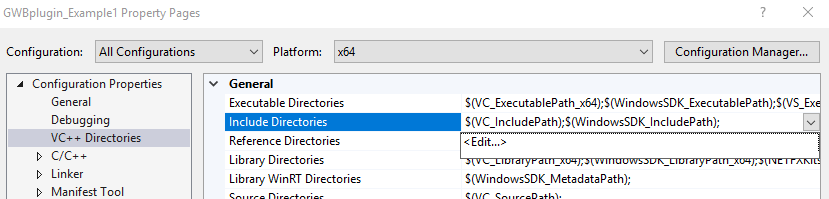
Add the 'src' folder of the GWB installation and click 'OK'
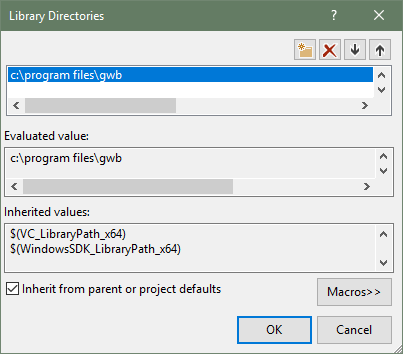
Edit the 'Library Directories' value.
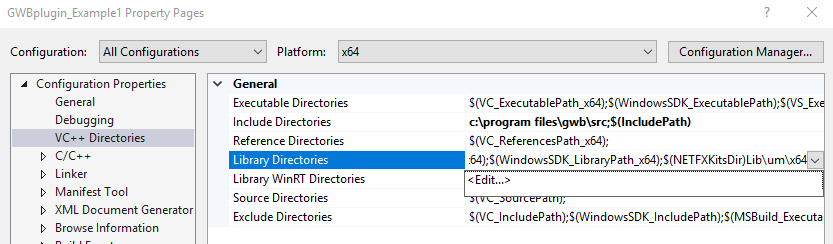
Add the GWB installation folder and click 'OK'
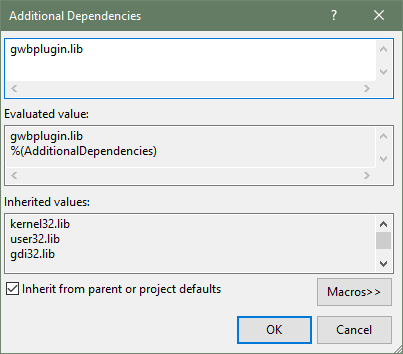
Under 'Configuration Properties' – 'Linker' – 'Input' edit the 'Additional Dependencies' value
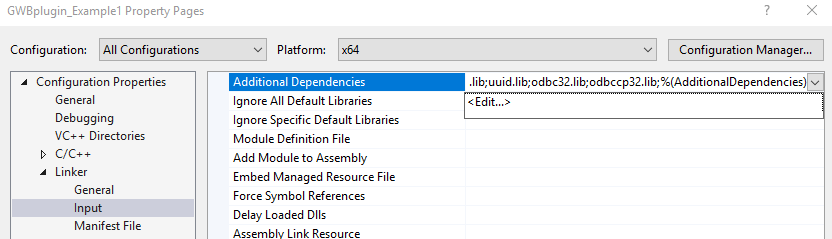
Add gwbplugin.lib and click 'OK'
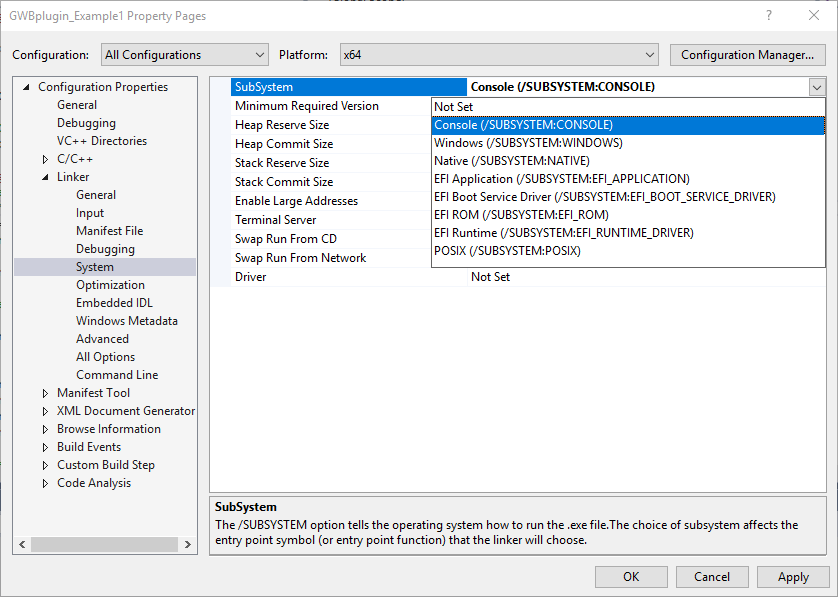
Under 'Configuration Properties' – 'Linker' – 'System' select 'Console (/SUBSYSTEM:CONSOLE)' as the 'SubSystem' value
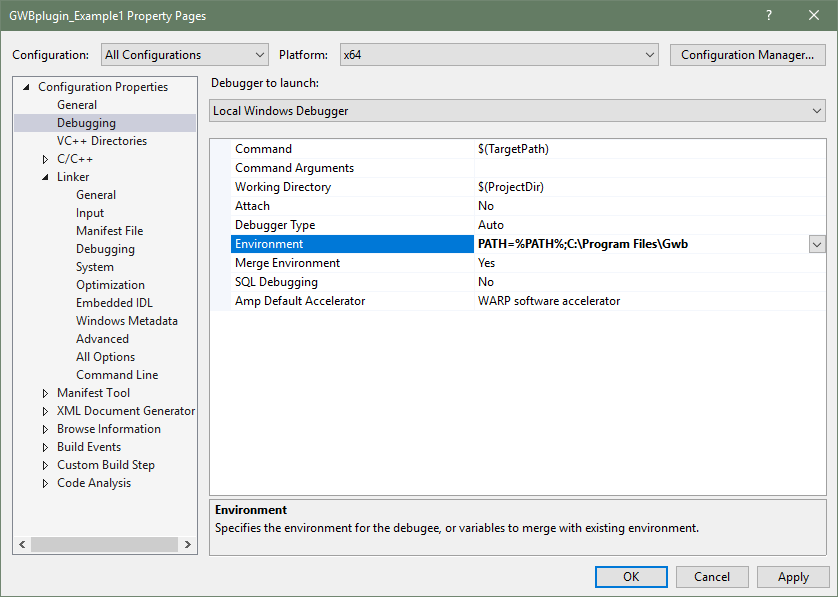
Under 'Configuration Properties' – 'Debugging' add the GWB install folder to the path in the 'Environment' variable. You can now click 'OK' to save the settings and close the project properties ...
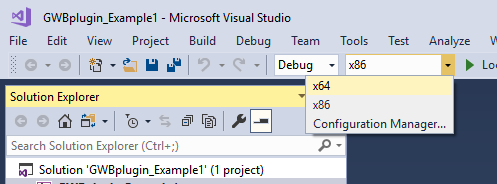
Before building the solution select the correct platform in the configuration dropdown
You are now ready to 'Build Solution' under the 'Build' menu ... Ctrl-Shift-B
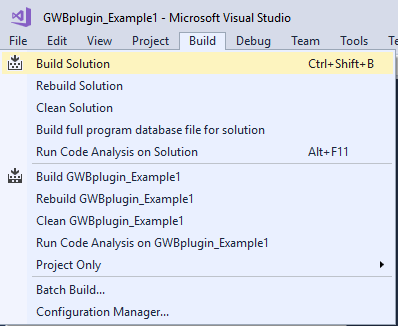
Make sure the project builds correctly and there are no errors ...

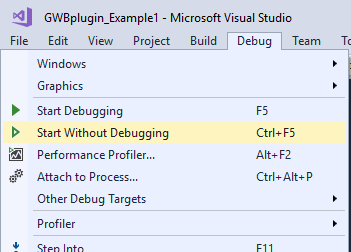
You can now 'Start Without Debugging' ... Ctrl-F5
Note: If you need to debug your program you must attach a debugger after the 'initialize' call to GWBplugin otherwise your program will encounter a run-time error. A good way to do this is to put in a getchar() call or something that will pause the program until you can attach the debugger.
Assuming everything is setup correctly and built without errors your program should launch and give output like this ...
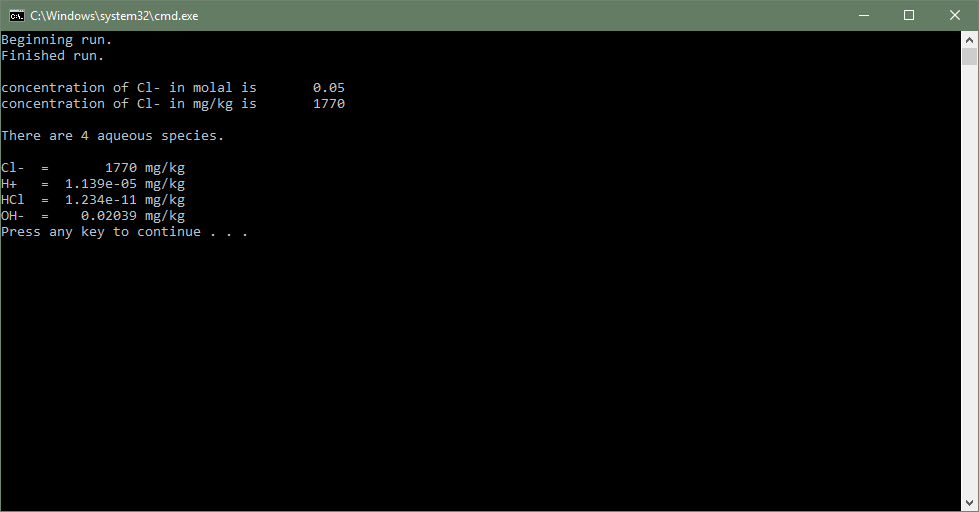
Congratulations on plugging into the GWB!
C++ plug-in support
What C++ compilers are supported by the GWB plug-in?
The plug-in has been tested using compilers from Microsoft, Intel, and GCC.
Why does it say it can't find the GWBplugin.dll when I try to run my program?
In order to locate the GWB DLLs that the GWBplugin class uses you must add the GWB installation directory to the PATH environment variable.
Where are the GWBplugin files that I need to link against located?
The GWBplugin export library (GWBplugin.lib) is installed to the GWB directory and the header file (GWBplugin.h) is installed to the "src" folder in the GWB directory.
In some previous versions of GWB the export library was also in the "src" folder.
Why does my compiler say that it can't find the GWBplugin library to link against even though I am using the full path to link?
This result is commonly caused from using a 32-bit compiler to link against a 64-bit library, or vice versa. Check to ensure the version of the compiler you are using is the same as the version of GWB you installed.
For answers to additional questions please check the plug-in section of the reference manual in the documentation, our main support FAQ, or contact us.