
Introduction and setup
Introduction and Setup is part of a free web series, ChemPlugin Modeling with Python, by Aqueous Solutions LLC.
What you need:
- ChemPlugin SDK 2025 recommended
- Python 3 recommended
- Notepad++
Download this unit to use in your courses:
- Course prep (.pdf)
- PowerPoint slides (.pptx)
To use ChemPlugin you will need a computer running Windows, either natively or under a virtual environment such as Parallels. You should follow the steps below to configure your laptop.
Introduction
This section gives examples of reactive transport models that can be constructed with ChemPlugin, the next explains how it works, and the following sections provide instructions for setting up your computer. Once you're set up, the ChemPlugin Modeling with Python course sequence will walk you through developing a series of short client programs from scratch.
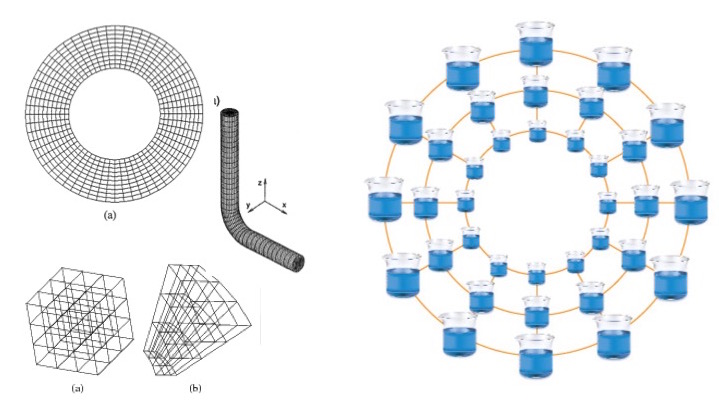
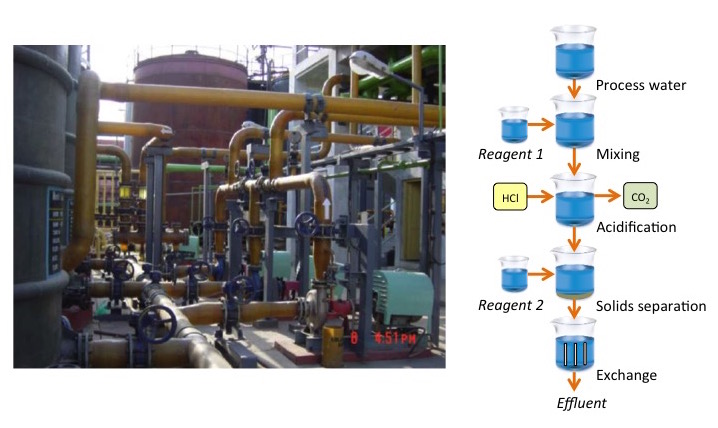
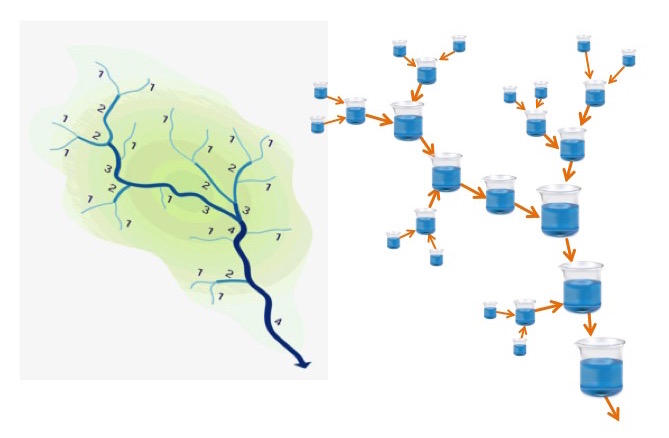
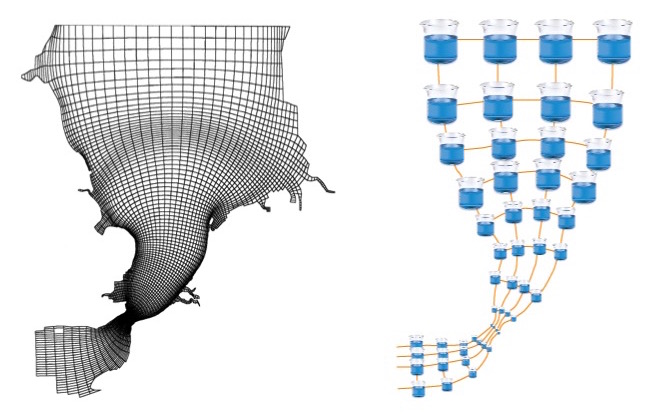
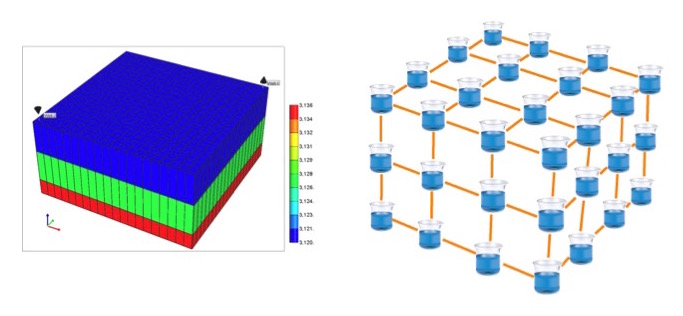
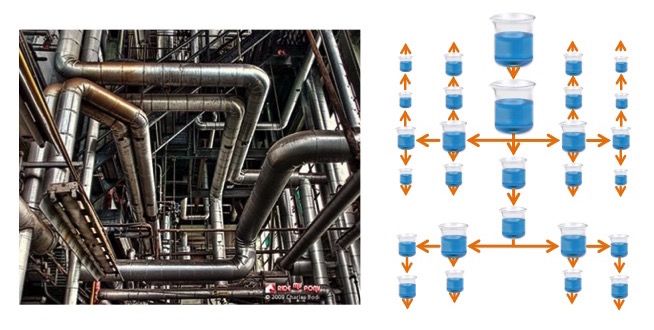
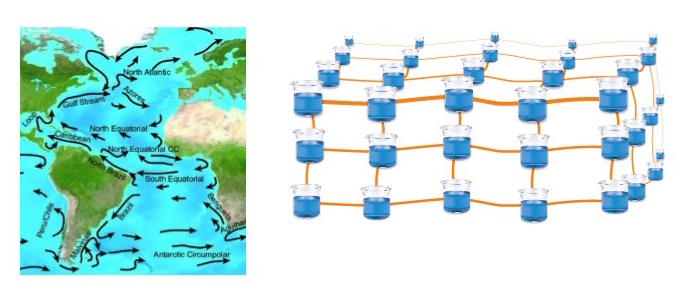
ChemPlugin instances self-link to create reactive transport simulators in virtually any configuration, whether a continuum in one, two, or three dimensions, a network, or a straight or branching chain. The insets below show examples of how reactive transport models might be configured by linking ChemPlugin instances in various geometries.
Groundwater flow
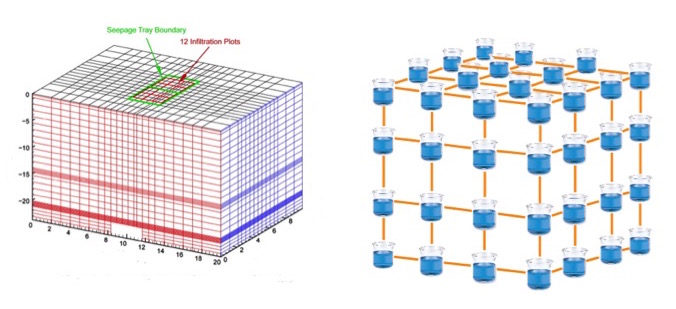
Engineered materials
Water treatment and industrial plants
Drainage basins
Estuaries
Reservoir simulation
Pipes and distribution networks
Stream, lake, and ocean currents
How it works
You supply the top-level program that calls the shots. ChemPlugin instances do the work, solving the mass and heat transport equations, and evaluating the chemical state of equilibrium and kinetic reactions.

The client program is the boss.
It may be a small program you write, or a legacy flow model being repurposed as an RT simulator.
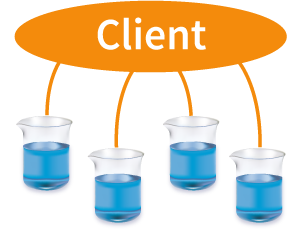
The client spawns ChemPlugin instances.
An instance may be a nodal block, a reach of stream, a reactor tank, and so on.
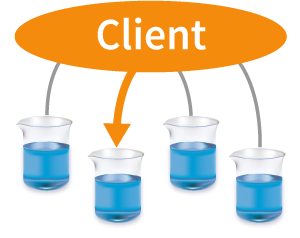
An instance is controlled by its member functions.
A call to “Config()” configurates the instance, “Initialize()” set its initial state.
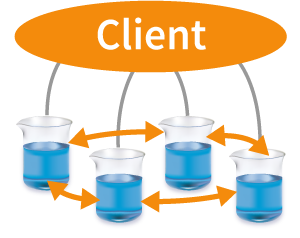
Instances self-link and work together.
The link instances work as a quorum to trace reactive transport.
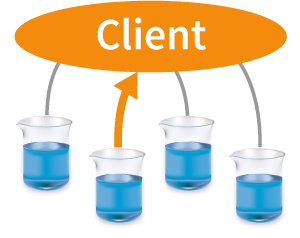
Results are available to client program.
Client uses “Report()” member function to retrieve results from an instance.
Step 1: Install Python
From the Python.org download pages, download and run a recent Python 3.x full Windows 64-bit or 32-bit executable installer that matches your GWB installation. We support the full Windows installer from Python.org. Other installations, such as Microsoft Store versions or embeddable or ARM versions, may have security limitations that prevent them from working properly with The GWB.
The 64-bit installer window should look something like this
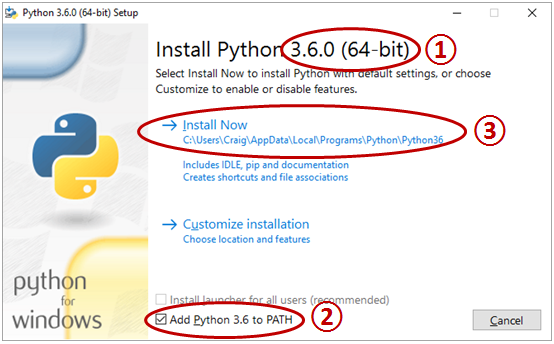
Check the box “Add Python 3.x to PATH” and then click “Install Now”. Follow the wizard to completion.
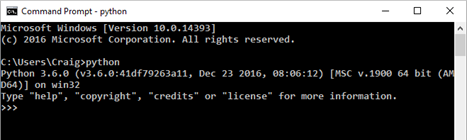
Verify the installation by opening “cmd.exe” and typing the command “python”. You should see
Step 2: Install Notepad++
We will use Notepad++ to edit Python scripts. Download the Notepad++ 32-bit installer from the package's download page. Run the installer directly — the default options are fine for our purposes.
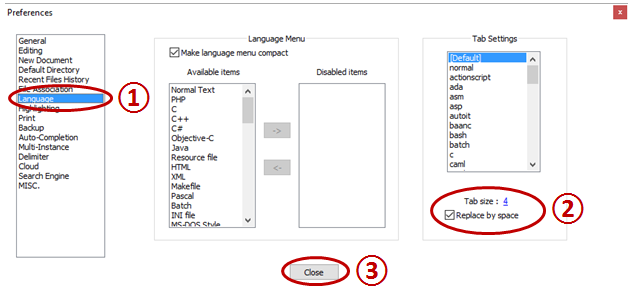
Open Notepad++ and on the menu bar click on “Settings → Preferences”. Choose “Language” on the left, set “Tab size: 4” on the right, and then select “Replace by space”, before closing the dialog
Step 3: Install ChemPlugin
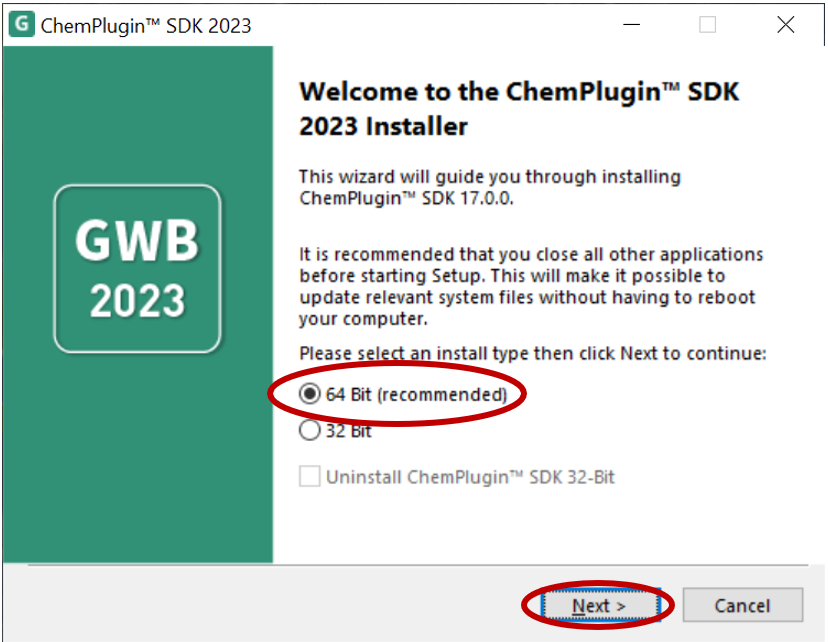
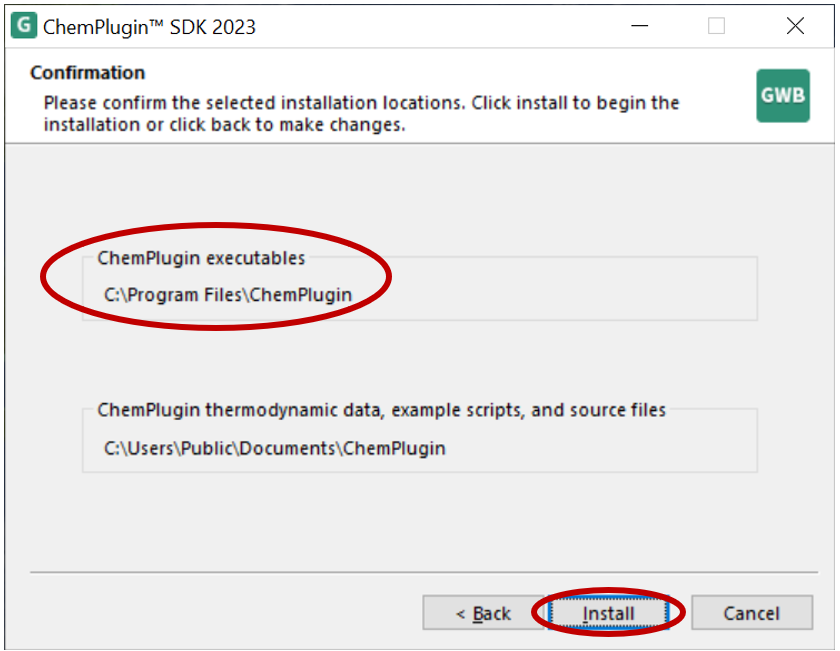
To use ChemPlugin, you need the ChemPlugin 2025 SDK installer, as well as an activation code. Alternatively, you may have access to The Geochemist's Workbench Professional or Advanced Professional 2025, which includes ChemPlugin 2025. Either way, run the installer, taking care to choose the 64 bit version.
During the process, note the directory (e.g., “\Program Files\ChemPlugin”) in which the ChemPlugin software is installed
At the completion of the process, be sure to check the box “Set user PATH and PYTHONPATH environment variables”
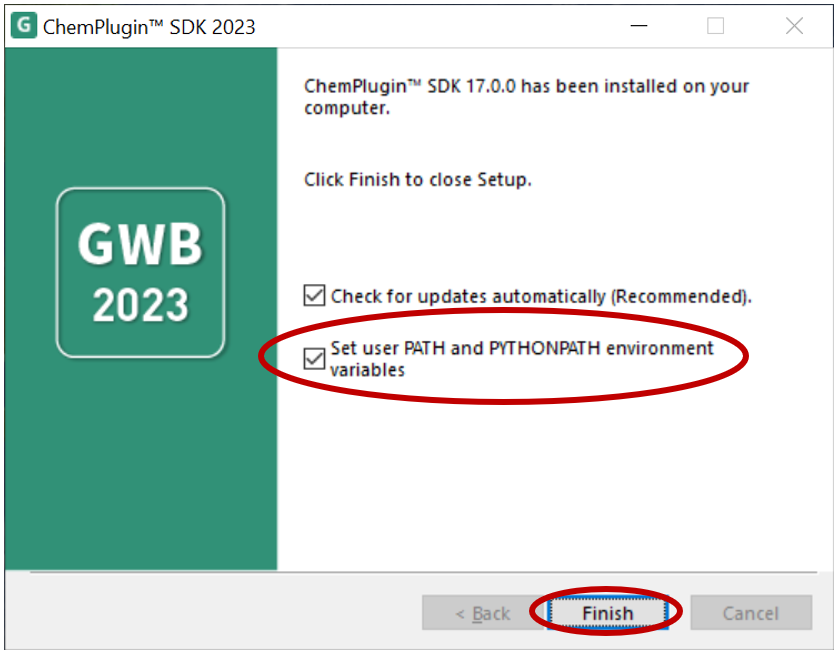
After you click “Finish”, wait for the installer to configure your computer. If you did not check the box, you can still configure your environmental variables manually, as described below.
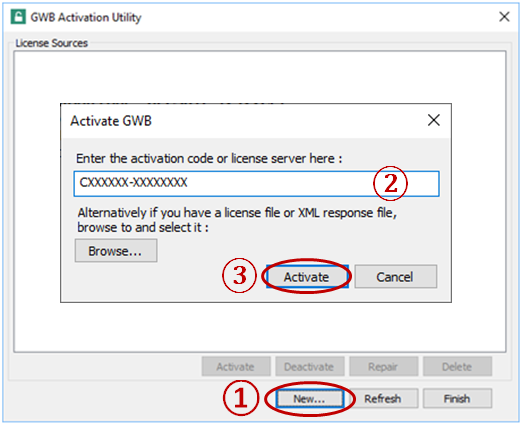
As the installation completes, you should see the activation dialog. If not, navigate to the installation directory and double-click on “activate.exe”. In the dialog, click on “New…”, paste your activation code in the space provided, and click on “Activate”
Click “Finish” and you are done!
Step 4: Environmental Variables
The final step is to set two environmental variables, if you did not check the box to do so in Step 3:
- “PATH” points to the ChemPlugin installation directory, as you noted above
- “PYTHONPATH” points to the “src” subdirectory, where ChemPlugin.py is installed
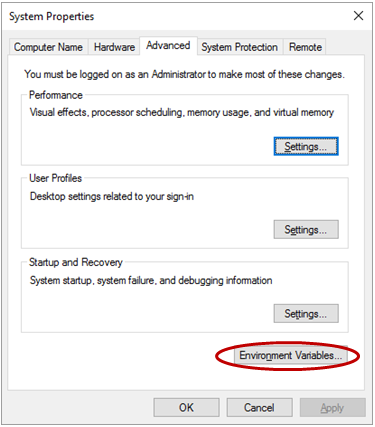
Open the Windows control panel by pressing the Windows key and typing “Control”. Select “Control Panel” and choose “System and Security”, followed by “System”. The panel should look like
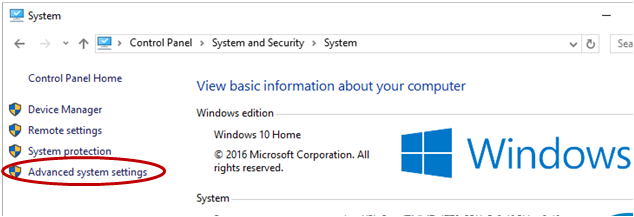
Choose “Advanced system settings” and then click on “Environment Variables…”
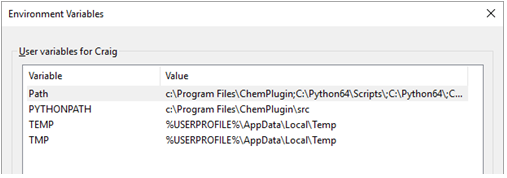
This will bring up a dialog with your current settings, which might look something like
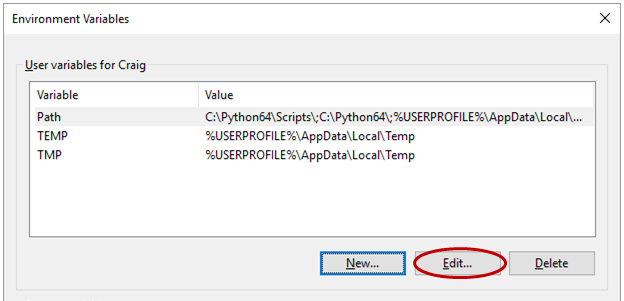
Select variable “PATH” or “Path”, then click “Edit…” to bring up a sub-dialog listing the entries in PATH
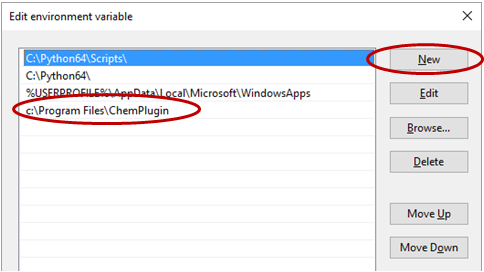
Click on “New” and add the installation directory (e.g., c:\Program Files\ChemPlugin”). You may prefer to use the “Move Up” button to shift your entry to the top of the list.
Click “OK” to close the dialog.
Returning to the previous dialog, choose “New…” to create a variable PYTHONPATH that points to the “src” subdirectory of the installation directory. If PYTHONPATH already exists, click on “Edit…” instead and append the “src” subdirectory to the existing string, separated from it by a semicolon
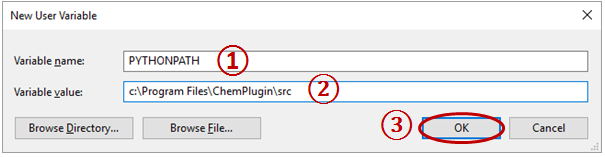
Click “OK” and verify the two variables are properly set
Click “OK” again, close the Control Panel, and you are done!
Final Check
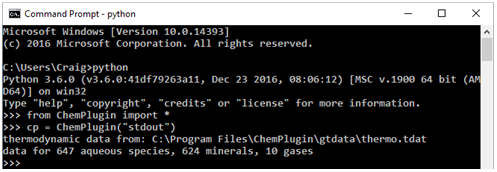
Start the command prompt, type “python”, and issue the two commands
    from ChemPlugin import *
    cp = ChemPlugin("stdout")
You should see:
Authors
Craig M. Bethke and Brian Farrell. © Copyright 2016–2026 Aqueous Solutions LLC. This lesson may be reproduced and modified freely to support any licensed use of The Geochemist's Workbench® software, provided that any derived materials acknowledge original authorship.
References
Bethke, C.M., 2022, Geochemical and Biogeochemical Reaction Modeling, 3rd ed. Cambridge University Press, New York, 520 pp.
Bethke, C.M., 2026, The Geochemist's Workbench®, Release 18: ChemPlugin™ User's Guide. Aqueous Solutions LLC, Champaign, IL, 303 pp.
All set up?
Move on to the next topic, First Encounter, or return to the ChemPlugin Modeling with Python home.