
Creating animation and video clips
Creating animation and video clips is part of a free web series, GWB Online Academy, by Aqueous Solutions LLC.
What you need:
- GWB Professional recommended
- VSDC Free Video Editor
-
Input files:
 .xtp file from any reactive transport model
Download this unit to use in your courses:
- Lesson plan (.pdf)
- PowerPoint slides (.pptx)
Task 1: Creating animation and video clips
X1t and X2t generate plot files with the ".xtp" extension. Upon completion of a run, click the Plot Results button or double-click on any saved ".xtp" file. When Xtplot opens, configure your plot.
Go to Format → Animate to set up your animation, choose an image format (PNG, a lossless format, is a good choice) and directory, then check "Save animation to image files"
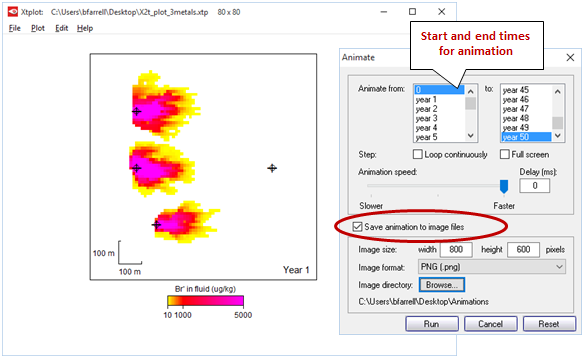
Clicking the Run button will start the animation and save an image file for every step. The files will be named sequentially (Image_0001.png, Image_0002.png, …) and saved to the folder you specified.
Open VSDC Free Video Editor, a free download from Flash-Integro LLC for computers running Windows 11 or 10, and click Create slideshow
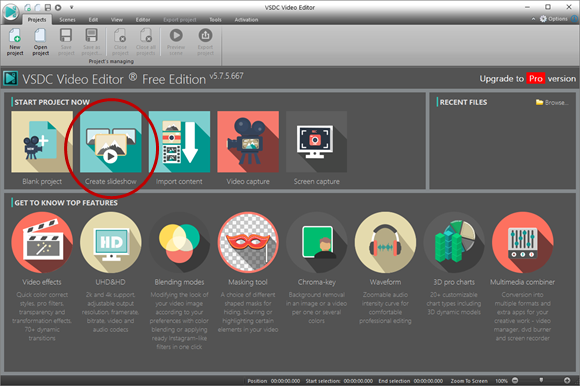
Give your project a title, specify the resolution and size if necessary (Xtplot produces 800 x 600 images by default), then click Finish to launch the File's sequence wizard

Left-click and hold the mouse button to drag your PNG files from your specified folder into the sequence wizard pane of VSDC. If necessary, drag slides within VSDC to reorder them
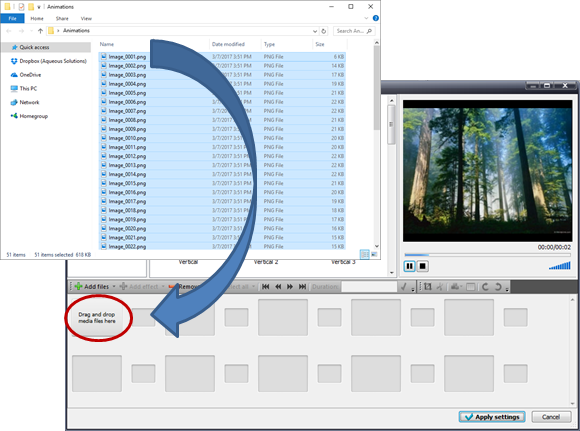
Select all frames and set the duration (in milliseconds) for each, then hit the green checkmark to apply

You can create additional slides (Title, Introduction, Sections, etc.) in MS PowerPoint and save these in the same format as your image files
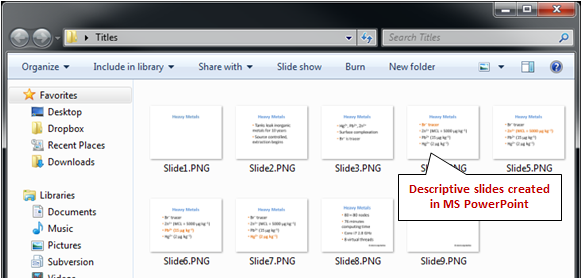
Drag these into VSDC as well and set their durations (you may want to set a longer duration for each descriptive slide), then hit the green checkmark to apply
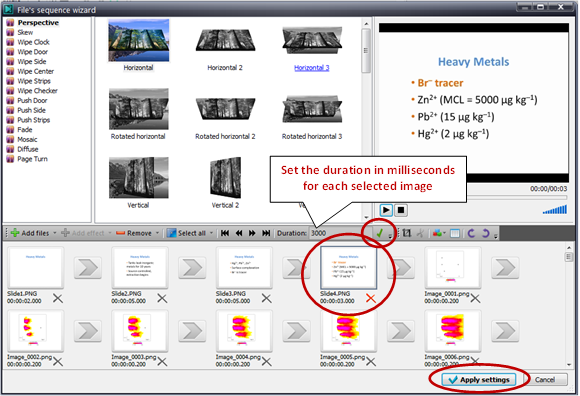
Hit Apply Settings to close the wizard and continue.
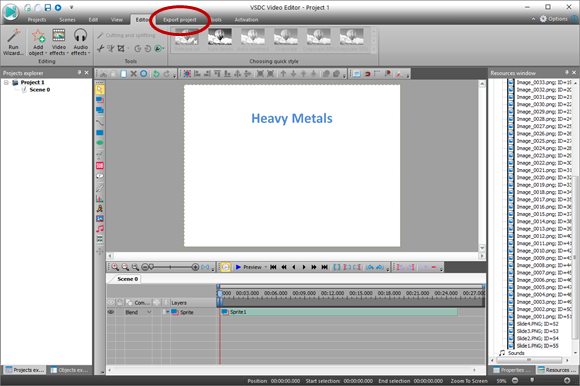
Move to the Export project tab
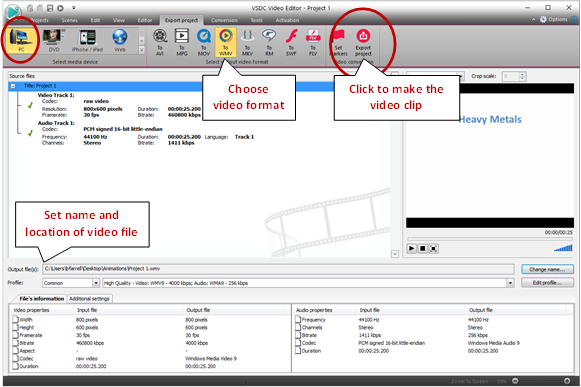
Save to PC, choose a video format, set the name and location of the video to be generated, then click Export project
If you're using the free version of VSDC, hit continue to finish
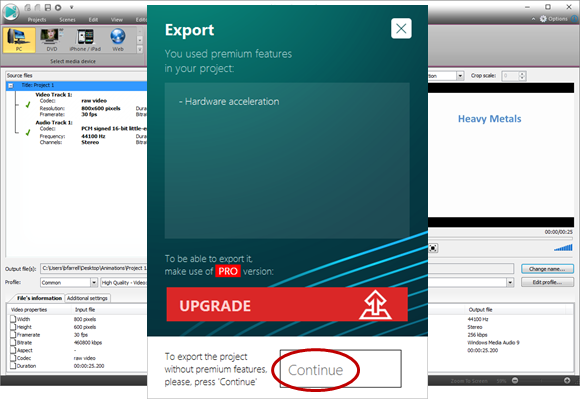
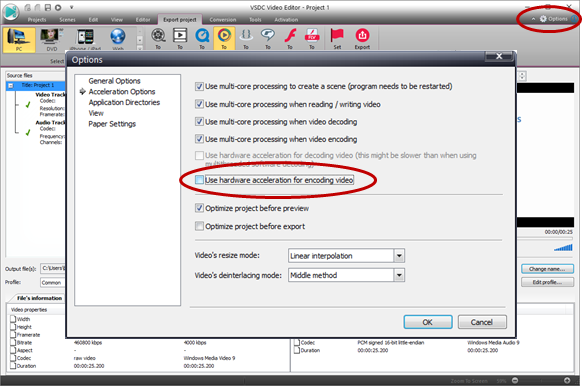
To avoid this message with the free version of VSDC, go to Options → Accelerator Options and uncheck “Use hardware acceleration for encoding video”
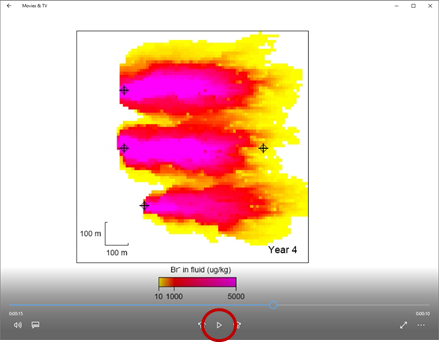
VSDC will assemble the slides together and save them as a video clip. Click the Play button to view your movie
Authors
Craig M. Bethke and Brian Farrell. © Copyright 2016–2026 Aqueous Solutions LLC. This lesson may be reproduced and modified freely to support any licensed use of The Geochemist's Workbench® software, provided that any derived materials acknowledge original authorship.
References
Bethke, C.M., B. Farrell, and M. Sharifi, 2026, The Geochemist's Workbench®, Release 18: GWB Reactive Transport Modeling Guide. Aqueous Solutions LLC, Champaign, IL, 191 pp.